As you begin your design journey, you may find yourself in need of adding text to your designs, like incorporating your company name or logo. Others have been in the same position as you before, so to ensure a seamless outcome, here are some useful tips for designing text and logos efficiently.
Extruding Text
When printing text on your part, keep in mind that extruding it may not always be the best option. While extruding text on the top can work well, there are issues that can arise when printing text on the side or bottom of your part. In my Design for 3D Printing: The Base piece, I discussed the problems with extruding text on the bottom.
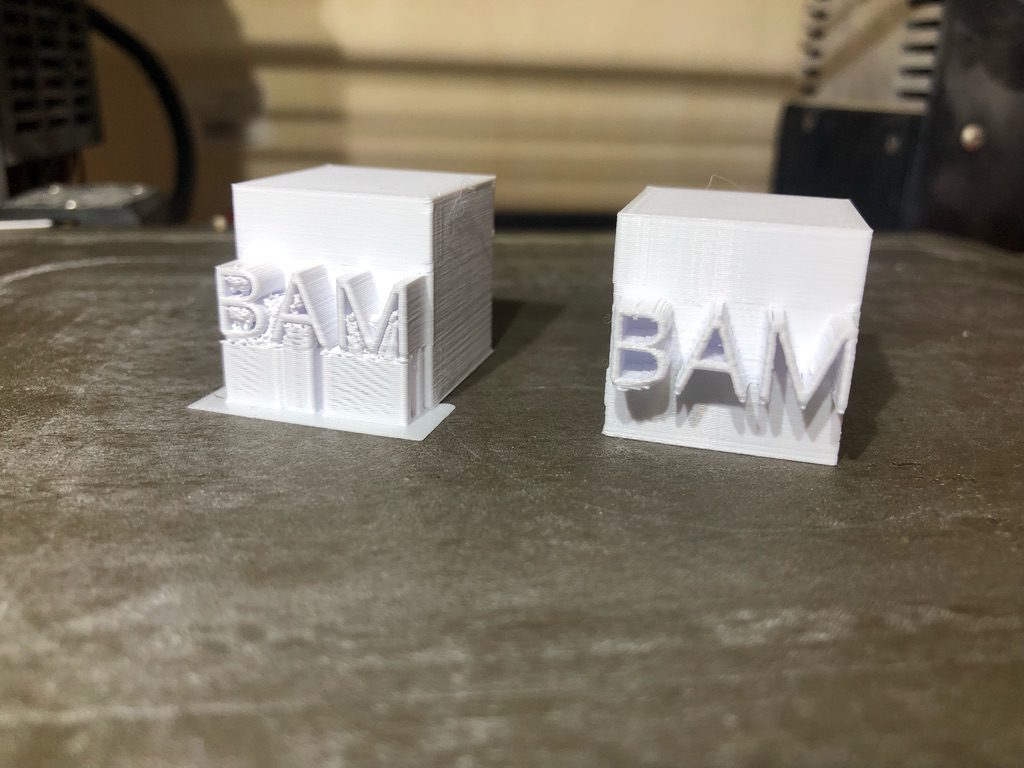
Here, let’s focus on text on the side of the part. The main issue is that overhanging text will likely require support, which can make the text look less sharp and create rough edges when trying to remove it from smaller areas, such as the center of a “D” or “A.” It’s generally best to avoid extruding text altogether. However, if you must extrude text (e.g., due to thin walls or braille functionality), I recommend only extruding by 1/32″. This will minimize the amount of support needed and allow the text to show up clearly.
Removing Text
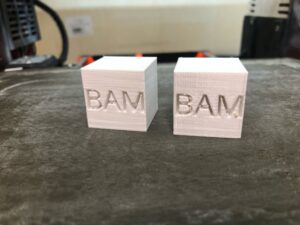
There are more effective techniques available to tackle the problem of carving text into an object. Rather than using the remove function, which can lead to issues such as deep grooves that require support and potential damage to the part, it is best to use alternative methods. It is important to avoid removing too much material from the part and instead use techniques that are both safe and effective.
Solution
I’ve found that a good way to make text visible on an object is to make a shallow cut of about 1/32nd of an inch into it. That way, you don’t need any extra support and can place the text anywhere without affecting the object’s aesthetic appeal during printing. To make sure the letters are visible, it’s important to make them thick enough for the nozzle to produce. I recommend using a line thickness of at least 1/16th of an inch, so that the slicer captures even the smallest details. Otherwise, the letters may not show up, even when using the latest Arachne slicing algorithms.
Designing Six Sided Dice
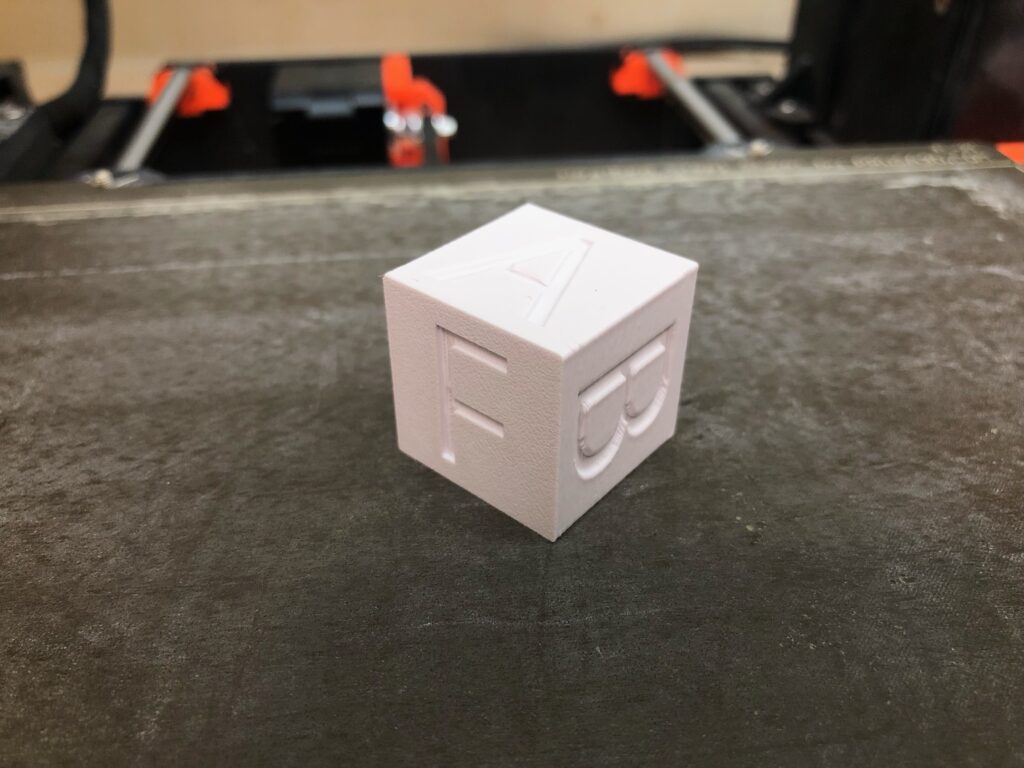
Let’s dive into the process of creating a 3D-printable six-sided dice. We’ll begin with a 1″x1″x1″ square block and add a letter to each of the six sides, starting with A and ending with F. This exercise will challenge you to consider the entire structure and determine the most effective way to print the letters.
To make printing without support on all sides, including the bottom, possible, I recommend using the remove tool to cut into the part by 1/32nd of an inch. The layers will bridge over the empty space created by the letters. In the attached picture, you can see which side was printed down, but the cube still looks fantastic because no support was used.